
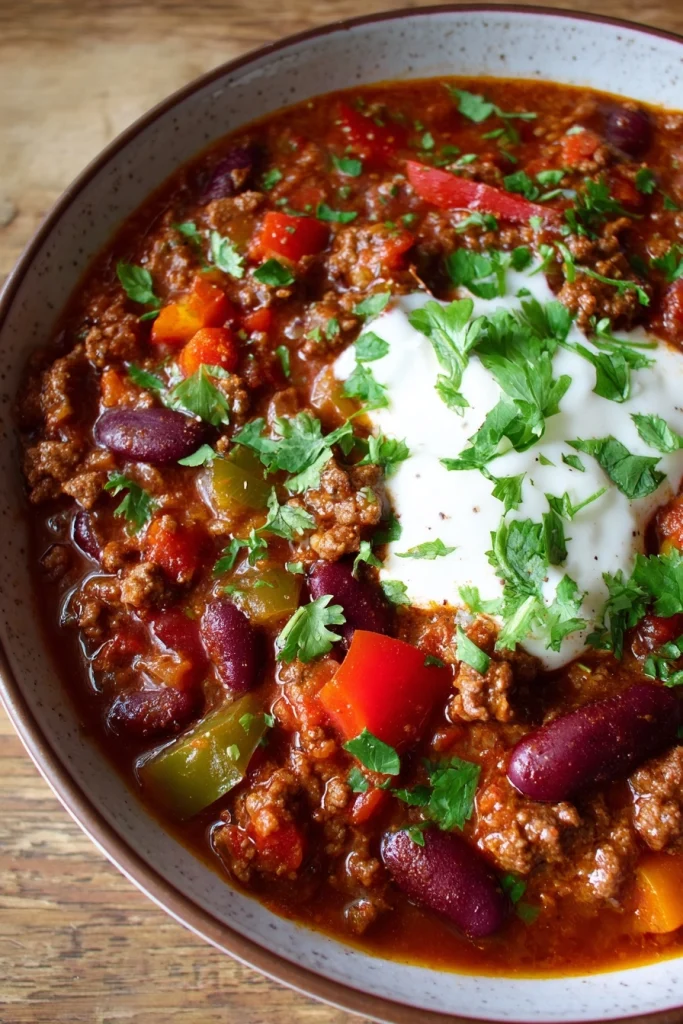
Camping chili con carne
There’s something magical about gathering around a campfire, sharing stories, and enjoying a warm meal. My go-to dish for these moments is camping chili con carne. It’s hearty, flavorful, and packed with protein to keep everyone satisfied after a day of outdoor adventures.
This recipe is perfect for busy moms and professionals like us, who crave a quick and delicious solution for family meals. Whether you’re camping in the woods or just enjoying a backyard fire, this chili will impress your loved ones and warm your hearts. Trust me, it’s a campfire delight you won’t want to miss!
Why You’ll Love This Camping chili con carne
This camping chili con carne is a lifesaver for busy days. It’s quick to prepare, taking just 15 minutes of prep time. The rich flavors meld beautifully as it simmers, creating a dish that feels like a warm hug. Plus, it’s versatile! You can customize it to suit your family’s tastes. Whether you’re at a campsite or your backyard, this chili is sure to bring smiles all around.
Ingredients for Camping chili con carne
Gathering the right ingredients is the first step to creating a delicious camping chili con carne. Here’s what you’ll need:
- Ground beef: This is the heart of your chili, providing rich flavor and protein. You can substitute with ground turkey or plant-based meat for a lighter option.
- Kidney beans: These add texture and fiber. Feel free to swap them for black beans or pinto beans if you prefer.
- Diced tomatoes: They bring moisture and acidity, balancing the richness of the beef. Canned tomatoes work great, but fresh ones can be used if you have them on hand.
- Onion: A must-have for flavor! Yellow or white onions are perfect, but red onions can add a nice sweetness.
- Garlic: Freshly minced garlic elevates the taste. If you’re in a pinch, garlic powder can be a quick substitute.
- Bell pepper: This adds a pop of color and sweetness. Any color works, but green bell peppers have a more robust flavor.
- Chili powder: The star spice that gives chili its signature kick. Adjust the amount based on your spice tolerance.
- Cumin: This warm spice adds depth. If you’re out, coriander can be a good alternative.
- Salt and black pepper: Essential for seasoning. Always taste as you go to get it just right!
- Beef broth: This enhances the chili’s richness. Vegetable broth can be used for a lighter version.
- Olive oil: Used for sautéing the veggies. You can also use canola or avocado oil if you prefer.
For exact measurements, check the bottom of the article where you can find everything available for printing. Happy cooking!
How to Make Camping chili con carne
Now that you have your ingredients ready, let’s dive into making this delicious camping chili con carne. Follow these simple steps, and you’ll have a warm, hearty meal in no time!
Step 1: Heat the Olive Oil
Start by heating a tablespoon of olive oil in a large pot over your campfire. The oil should shimmer but not smoke. This is where the magic begins!
Step 2: Sauté the Vegetables
Add the chopped onion, minced garlic, and bell pepper to the pot. Sauté them for about 5 minutes until they soften and become fragrant. This step builds a flavorful base for your chili.
Step 3: Brown the Ground Beef
Next, stir in the ground beef. Cook it until it’s browned, breaking it apart with a spoon. This should take about 7 minutes. Make sure there are no pink bits left; we want it fully cooked for safety and flavor!
Step 4: Add Spices
Once the beef is browned, sprinkle in the chili powder, cumin, salt, and black pepper. Stir everything together, letting the spices coat the meat and veggies. This is where your chili starts to get its signature kick!
Step 5: Combine with Tomatoes and Broth
Pour in the diced tomatoes and beef broth. Give it a good stir, bringing the mixture to a boil. The tomatoes will add moisture, making your chili rich and hearty.
Step 6: Add Kidney Beans and Simmer
Now, it’s time to add the kidney beans. Stir them in and reduce the heat to let the chili simmer for about 30 minutes. This allows all those wonderful flavors to meld together. Don’t forget to stir occasionally!
Step 7: Serve and Enjoy
Once the chili has thickened and the aroma fills the air, it’s time to serve! Ladle it into bowls and enjoy it hot. Pair it with cornbread or tortilla chips for a complete camping meal. Trust me, your taste buds will thank you!
Tips for Success
- Prep your ingredients at home to save time at the campsite.
- Use a heavy-bottomed pot to prevent burning over the campfire.
- Adjust the spice levels to suit your family’s taste; add more chili powder for extra heat!
- Let the chili sit for a few minutes after cooking; it thickens up nicely.
- Don’t forget to pack a can opener if you’re using canned ingredients!
Equipment Needed
- Large pot: A sturdy pot is essential for cooking over the campfire. A Dutch oven works great too!
- Wooden spoon: Perfect for stirring your chili without scratching the pot.
- Campfire grill: If available, it helps to stabilize your pot over the flames.
- Can opener: Don’t forget this handy tool for your canned ingredients!
- Heat-resistant gloves: Protect your hands when handling hot pots.
Variations
- Vegetarian Option: Swap the ground beef for lentils or a mix of your favorite beans for a hearty vegetarian chili.
- Spicy Kick: Add diced jalapeños or a splash of hot sauce for an extra layer of heat that chili lovers will adore.
- Sweet and Smoky: Incorporate a tablespoon of brown sugar and a dash of smoked paprika for a unique flavor twist.
- Southwestern Flair: Toss in corn and diced zucchini for a colorful, veggie-packed chili that’s bursting with flavor.
- Low-Carb Version: Replace kidney beans with cauliflower rice or diced bell peppers to keep it low-carb while still satisfying.
Serving Suggestions
- Cornbread: Serve warm cornbread on the side for a classic pairing that complements the chili perfectly.
- Tortilla Chips: Crunchy tortilla chips make a great accompaniment for scooping up the chili.
- Fresh Salad: A light green salad adds a refreshing contrast to the hearty chili.
- Cold Beverages: Pair with iced tea or lemonade to balance the warmth of the chili.
- Garnishes: Top with shredded cheese, sour cream, or chopped green onions for added flavor and presentation.
FAQs about Camping chili con carne
Can I make camping chili con carne ahead of time?
Absolutely! You can prepare the chili in advance and store it in an airtight container. Just reheat it over the campfire when you’re ready to enjoy it. This makes it a fantastic option for busy days or camping trips!
What can I use instead of ground beef?
If you’re looking for alternatives, ground turkey or plant-based meat are great substitutes. They provide similar texture and flavor while being lighter options. You can also use lentils for a vegetarian twist!
How spicy is this chili?
The spice level is adjustable! The recipe calls for chili powder, but you can add more or less depending on your family’s taste. For those who love heat, consider adding diced jalapeños or a splash of hot sauce.
Can I freeze leftover chili?
Yes, you can freeze any leftovers! Just let the chili cool completely, then transfer it to a freezer-safe container. It can last up to three months in the freezer. When you’re ready to eat, thaw it in the fridge and reheat over the campfire.
What should I serve with camping chili con carne?
This chili pairs wonderfully with cornbread, tortilla chips, or a fresh salad. You can also top it with shredded cheese, sour cream, or chopped green onions for an extra burst of flavor. Enjoy your meal!
Summarizing the Joy of Camping chili con carne
Camping chili con carne is more than just a meal; it’s a heartwarming experience that brings people together. The aroma wafting from the pot as it simmers over the campfire creates an inviting atmosphere, perfect for sharing stories and laughter. Each spoonful is a reminder of cozy nights spent under the stars, surrounded by loved ones.
This dish is not only delicious but also adaptable, making it a favorite for families with varying tastes. Whether you’re camping in the great outdoors or enjoying a backyard fire, this chili is sure to warm your heart and satisfy your soul.
PrintCamping chili con carne: The ultimate campfire delight!

A hearty and flavorful chili con carne perfect for camping trips, packed with protein and spices to warm you up by the campfire.
- Prep Time: 15 minutes
- Cook Time: 30 minutes
- Total Time: 45 minutes
- Yield: 4 servings 1x
- Category: Main Course
- Method: Campfire Cooking
- Cuisine: American
- Diet: Low Fat
Ingredients
- 1 lb ground beef
- 1 can (15 oz) kidney beans, drained and rinsed
- 1 can (15 oz) diced tomatoes
- 1 medium onion, chopped
- 2 cloves garlic, minced
- 1 bell pepper, chopped
- 2 tbsp chili powder
- 1 tsp cumin
- 1 tsp salt
- 1/2 tsp black pepper
- 1 cup beef broth
- 1 tbsp olive oil
Instructions
- Heat olive oil in a large pot over the campfire.
- Add chopped onion, garlic, and bell pepper; sauté until softened.
- Stir in ground beef and cook until browned.
- Add chili powder, cumin, salt, and black pepper; mix well.
- Pour in diced tomatoes and beef broth; bring to a boil.
- Add kidney beans and reduce heat; let simmer for 30 minutes.
- Serve hot and enjoy your camping meal!
Notes
- Feel free to add more spices according to your taste.
- Can be made in advance and reheated over the campfire.
- Serve with cornbread or tortilla chips for a complete meal.
Nutrition
- Serving Size: 1 cup
- Calories: 350
- Sugar: 3g
- Sodium: 800mg
- Fat: 15g
- Saturated Fat: 5g
- Unsaturated Fat: 8g
- Trans Fat: 0g
- Carbohydrates: 30g
- Fiber: 8g
- Protein: 25g
- Cholesterol: 70mg